Sunday 10 March 2013

Blood Angels Death Company Librarian

So, as some of you may know, I've been making a Blood Angels Army. 

Currently, my list comprises:

2 HQs, a Reclusiarch and a Librarian.

20 Jumppack Assault Marines

10 without, in 2 Razorbacks.

10 Death Company with a Land Raider Redeemer

2 Storm Ravens

So Far, I've completed
- Both HQs, 4 Assault Marines and 4 Death Company.

I'm not too fazed about the armour; I have models (not blood angels, but otherwise correct) that are fitting for those roles. This is great, because I can run the army while I paint it, making painting a little more fun and fielding each model just a little more exciting. Garish jet black and bright red stops being so strong against the dull red/blue of my marines, and are starting to look more fitting.

So, as a rule, the only people Fearless (mad) enough to run with a Death Company are the Chaplains or Reclusiarchs of the Blood Angels / Blood Angels Successor Chapter. That said, even the best and brightest of the chapter live in eternal fear that one day they will fall to the formidable rage that is the death company. While some, Mephiston, Lemartes can overcome or control the blood thirst of their fate, many simply allow it to consume it.

In this case, the Librarian running with the Death Company is not simply someone attached to the company, he is a part of the death company for all intents and purposes. (Of course, if the game needs him to go off alone, I'm sure he can control his rage for long enough to win me the game...)

What you'll notice immediately is a Board Shield from a Bretonnian Man At Arms model. You're thinking
"What the hell is that doing there?"
Well, it's simple really: This is a Blood Angels Librarian. His Psychic Powers are Unleash Rage and Shield of Sanguinius.

Unleash Rage is easy to represent; he's a member of the death company. His rage is unleashed as a rule.

The Shield of Sanguinius power required more creativity to represent.

What you'll notice in the example to the left is that his hand is open and  out, as if he was pushing the shield out with some form of telekinetic power.

Eh. I thought it was a nice touch.


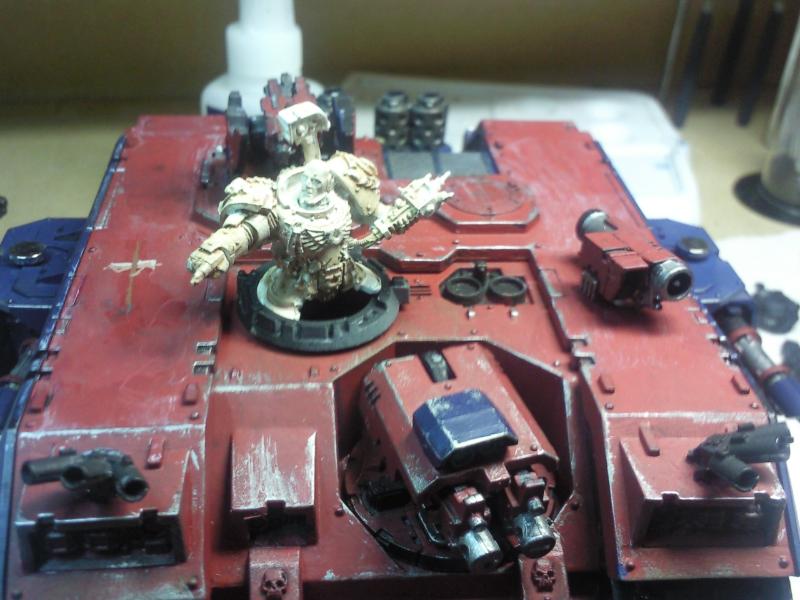
Sword's done in my standard way, with bouncing electricity coming from the haft. I decided to add a green  lightning strand as well because it's meant to be a forcesword. Otherwise, the model is a death company member with blue armour parts (the helmet, hands and the shoulder pads.) so that everyone knows he's a DC libby. 


From the back


And a full view. He sits in the centre of my death company  I think he's going to be a suitable centrepiece.  

Oh, if you're wondering, the Sword is from a GK terminators kit. This is, effectively, so that no-one can complain about the model being "based on too large a base". (not that it should really matter - he's not going to get stuck into combat.)


Friday 8 March 2013

Battle damage: What is too much?

Right, so I've seen lots of battle damage. It's like cheap porn in the world of tabletop gaming for painting purposes. It's easy to find, easy to produce and best of all, it is appealing for a little while. (I'm not making a comment on the quality of pornography, take what you want from that message.)

But... There are lots of ways to do battle damage, and a lot more ways to overdo battle damage.

Such as this older Land Raider. you can see the silver's just been splashed around a little, overbrushed very badly and as a result, the model looks horrid.

So, this means that some level of subtlety must be necessary for your Marines, surely? I mean, sure. They're going to have battle damage, they're constantly fighting, but they can't Never have a new paint job.

So, painting armour becomes about patience and restraint, and less about making the marine look like he just took a bath in acid. and bases. then water.

Note, you could actually make your metal models look like they took a bath in acid, but placing models in hydrogen peroxide is a bit of a dumb move - much like playing Dark Angels Flyers.

So, I've thrown three terms up: Subtlety, Patience and restraint. These could be shortened to "Discretion". What do I mean by this?

Discretion could be defined as: "The Quality of Behaving in such a way as to avoid causing offence." Lemme tell you, scratched up armour is pretty offensive.

So, behaving in a way that you avoid making armour damage that is garish (out of place) but enough that one will notice it as intentional. Enter, Blood angles assault marine:

Of course, you may not agree that my Assault marine is of a good battle damage quality. That's fine. but we'll still rely on it as our example.

You'll immediately notice 3 things about the battle damage on this models armour (note that at this stage, the model has only had minor highlighting done.)


  1. The damage is in one area. That is, the chest plate and abdominal plate, off to the left.
  2. This damage is very much intentional. 
  3. I have not dry brushed at all. 

Let's take a closer look:

The battle damage has not been disturbed at this stage, but note that the model is "Finished."

The three distinct damages are obvious here. They can be split into two types:

1. "Battle damage"
2. "Wear damage"

Mostly, people have a lot of wear damage and call it "battle damage".
Wear occurs mostly on parts of metal that are handled often. If anyone reading has metal models, they will know exactly what I mean. So, when making wear damage, make sure that you're brushing corners and areas that would get touched. (for example, the ladders that a space marine climbs to get atop their Rhino.)

Excuse my incredible paint skills.
In this case, I assumed that the space marine would be removing his chest-plate and abdominal plate from the two points where the wear occurred. I also assumed that the deterioration of this plating would be very quick because his hand may still be mailed while he was removing it, and metal rubbing against metal causes wear much faster than skin against metal

Alone the chest, there's another scratch which isn't obviously a place where wear would occur. In this case, the damage is cut into the armour (literally cut, as I cut the resin.) and so is "Battle damage".


Another example of extreme wear damage is on the helm of this model, where I would imagine the marine constantly removing and replacing his helmet with his off hand (the one without the sword) and so this is where the wear would occur.

In this case, the damage is filed onto the model, even though it is not battle damage. This is because the part of armour here would wear much faster than the chest plates, which are removed far less often. (even then, this helmet is almost overdone and unfortunately, has a garish appearance.)


In the end, battle damage made with discretion has allowed me to create a model with much more believable scrapes and dings in his armour. So, in future, remember: when painting battle damage, discretion and patience is everything.

Using Resin Vents to Make Texas Barriers

So, recently I bought 25 Assault Marines from forgeworld, in addition to some Meltaguns, flamers and missile launchers (if you couldn't guess, to arm my assault marines.)

I noticed very quickly I was swamped with these small, rectangular prisms that looked a lot like a Texas Barrier to me.

Needless to say, my grey fingers (geddit? Like a gardener's green fingers! Hah.) got to work imediately. How could I turn this


Into this?

Thanks, Dessel Studio for the Image
Well, as it turned out, it wasn't very difficult.

All I needed was:
- a resin vent. (Any size will do - just be consistent.)
- an exacto knife 
- a Pin Vice
- Some Superglue
- a Paper clip.

All of these things, after purchasing FW material, you should have on you anyway.

So, the method is very simple.

Firstly, you cut away the thin excess that actually attaches to the model

I used clippers first, so that I wouldn't slice the resin willy-nilly. If you've every worked with this stuff before, it can be hard to start cutting it, but once you have the downward force necessary, it cuts in an instant. I do reccommend cutting with clippers and then cleaning gently with an exacto knife and a file. Trust the gouges in my thumb.

The next step is to get your Pin vice and drill holes in the piece of resin. These will create holes for you to put small paper clips in (well, rods of paper clip.) to simulate the metal rods used to make cement more resilient.

If you decide that later you want to include battle damage, it may be prudent to also drill holes in the flanks of the barrier to put metal rods in. I'll show you the cool thing you can do with this in a moment.


You should end up with something that looks like this. Note I didn't measure the distances from the metal rods, because I don't think it is important. Of course, if you choose to do this, you will only be judged a little.

The next step is the fun part: Battle damage.
This step requires some careful knife work for a number of reasons:

1. Resin is slippery: Well, it isn't, but knives seem to think so. So you will cut yourself (I guarantee this.) you aren't careful. Remember to exercise caution. (Insert a crude "Cut4bieber" joke if you wish.)

2. It's far, far too easy to go overboard: you may think you're doing something that looks awesome... but when you look at it in six months time you'll say "why did I do that much?". Just limit yourself. IF you think "It just needs this one more little gauge here to be finished", it's probably finished.

3. Think about what material you're sculpting versus what it's meant to represent: Resin cuts smooth, but a krak missile exploding into a piece of cement will leave a different impression. Have a look around the web for suitable source images of damage. I Couldn't find any myself, I'm afraid, but collective google-fu will work (feel free to post them as comments. It would be much obliged.)

In the example off to the right, I've gone a bit overboard. There's a small bullet hole, a direct hit from a krak grenade (right to left respectively.) and then some heavy firefight damage that has worn to the bare stilts of the barriers.


You'll notice in this final example, the damage has worn the barrier down so far that not only is the vertical rod exposed, but both horizontal rods are exposed. This was achieved by doing the damage first, then drilling horizontally, fitting the horizontal rod and then finally fitting the vertical rod


Final step was to glue it to cardboard so that it could be based and painted. You could skip this and simply paint it, but this is your final result.

Enjoy your new piece of terrain!