Thursday, 27 April 2017

The Math of Warmachine Pt 1: Rolling to Hit.

1D6, 2D6 or 3D6 when rolling to hit? 

Super complicated. 

Warmachine has a beautiful system in the form of the 2D6 mechanic, allowing for a lot more dynamic in gameplqay when it comes to rolling, as well as some interesting patterns when determining what constitutes a "hard" roll to make. The maths presented here might help you to better understand when you should increase your odds, when you should boost, and when the dice should roll favourably without help.

So, what kinds of math do you need to understand? For the most part, it's just simple frequencies and percentage math. It's worth noting that there is a huge shift in dynamic between 1D6 and 2D6, but also that 2D6 and 3D6 follow a similar pattern to each other. Since we use 1D6 very little I'll just include this graph with a short explanation. This is usually called a "Uniform Distribution". 

With that out of the way, we get into the meat of this article: 2D6 and 3D6 dice maths. Unlike 1D6 math, 2D6 and 3D6 rolls can have a multitude of different rolls which produce the same result. For example, 2D6 can roll a 1 and a 5, or a 2 and a 4, or a 3 and another 3 in order to roll a six, while 1 dice can only roll a six one way. What this means is that the values are distributed less evenly and will tend towards the middle more readily; it looks more "smooth" and is usually described as a unimodal distribution. This trend is very visible in the graph to your right.  You can see that the same trend is noticeable for 3D6, and it is less 'sharp' than the 2D6 graph is. The more dice you add, the smoother this curve will become. You'll also notice that the ends of the graph slope off harder the more dice you roll. This means your chance of rolling extremely high numbers are lessened, but your chances of rolling very low dice are also lessened.

Improving The Roll

So, now we come to the crux of the issue what is the correct way to improve this dice roll? A problem with asking this question is that it isn't very sensible: If you need to improve a dice roll substantially, boosting and increasing your RAT/MAT are both equally valuable, so you should use whichever answer is most effective or most efficient, or what you have available to you at the time. This doesn't mean we can't look at how these modifications to your dice roll influence your chances, however; and with this in mind, there are two ways to increase your odds. While they are functionally the same, I've differentiated them as "improving consistency" and "improving raw odds".

 Improving Consistency.

You might've noticed in the graphs above something that I described as "smoothing", or that the more dice you add, the more your roll will tend towards the average, middle for the number of dice you're rolling. (Add 3.5 to your average for every dice being rolled to determine the average number). Therefore, you produce more consistent, higher rolls simply by increasing the number of dice you roll. You can see how 2D6 and 3D6 differ in the two graphs below. The orange line represents your chance of rolling an 8 or better - refer to the final column's orange mark if you're unsure which value you're looking for to see what you score. You can see that you only hit an 8 on 2D6 about 40% of the time, while you could hit an 8 almost 85% of the time on 3D6. The contrast is stark. 

You'll notice that these graphs are produced so that the percentages increase as you go up in value, rather than being a unimodal distribution the way they're shown in the first set of graphs. That's because, for our purposes, we need to roll higher, meaning that even though 6 and 15 are technically an equal roll, we will tend to prefer the 15. 

Improving Odds

The Alternative is decreasing the number you need to roll, either by increasing your MAT/RAT or your opponent's DEF, or both. We usually refer to the act of narrowing the gap as a "swing". So, let's look at reducing an 8 to hit to a six to hit, on 2 dice and determine what kind of difference it makes. 

 As you can see, your chance of hitting increases to about 70%. Not quite as drastic as the difference between 2D6 and 3D6, but +2 to hit still makes a notable difference. 

What's the difference? 

So, we've seen how adding dice impacts the roll, as well as how changing your roll's benchmark impacts it, but how do we tell what the tangible difference is? There's a problem with asking this question, in that a +2 to hit impacts a roll in one way that is clearly inferior to a an additional dice, but the same would not be true of a +6 to hit - The problem with comparing the two is that the added dice adds a spectrum of results, such that sometimes it will perform worse than the +2 to hit (approximately 1/6 times, when your boost dice rolls a 1), sometimes it will perform the same (when it rolls a 2), and most of the time it will outperform a +2, where it could roll a 3, 4, 5 or 6. However, if that dice was competing with +6 to hit, suddenly the dynamic shifts in favour of improving your odds. At that point, the only time where 1D6 is even on par with +6 is when it rolls a 6, and is inferior in every other instance. 

What Should I aim for? 

Generally speaking, you should aim for less than a 7 to hit on 2D6, and if you can, less than a 10 to hit on 3D6. If you're rolling an 8 on 2D6, boosting to a 6 is always advisable. Otherwise, you might be looking for a spike - As an example gun bunny spam will routinely try for 12s or may even go for 14s, in the hope that just a few of them break through. Ideally you will increase your odds, but if you're left with no other option, it's better than nothing. Always quickly evaluate the dice roll before making it, and don't get tilted if you roll poorly. Just because you should hit a boosted 8 80% of the time, doesn't mean you will hit 4 out of 5 8's. 

Exceptions to note:

Sometimes it's worth boosting even if you wouldn't normally need to. An example could be a stormclad who finished off a light 'jack in two hits, with only an infantry model in melee range. You wouldn't normally boost to hit a 7, but if it nets you an extra kill through e-leaps, you might as well. It may also not be worth boosting a 7 to hit if your normal dice attack wouldn't be strong enough to crack armour - it'd be better to take a chance on the roll, miss and buy another, than to boost to hit and fail to crack armour. 

Outgoing:

Some of this math may have been poorly explained or I may have misrepresented some of the math. For the most part, I did my best to present it clearly and concisely, but given that it is not a field of expertise for me I feel I may have made some mistakes. If you'd like clarification, or would like me to make an addendum where I've made a mistake, feel free to comment below and let me know how bad at this I am! If people are interested, I may also go into the topic of standard deviation when doing dice rolls, but since I tried to keep this (very) beginner, I decided not to broach the subject.

Saturday, 22 April 2017

Kotov Syndrome and your Death Clock


Kotov Predicted Haley 3 Nerfs. 


A recent thread on the Cygnar Facebook Group sparked me to get back into blogging. In the thread in question, A person decried Warmachine's current state as being relatively low risk, likening it to chess. Now, I'm not going to talk about what he said here, but I will use it as a launching pad to talk about the concept of Kotov Syndrome, and how you overthink your turns. In this post, I will explain Kotov Syndrome, how players fall victim to it, and some strategies to deal with it. In doing this, I hope to create a resource which players can draw upon in order to improve their time spent playing.

Grand-Master Kotov.

Kotov Syndrome 

In 1971, Chess Grand-master Alexander Kotov penned a book titled Think Like A Grandmaster, in which he described a situation in which a player in a bind considers his options intensely, when he's unable to find a way to solve his situation, he panics and makes an exceptionally poor move that could cost him the game.

Death Clock 

This concept of Kotov Syndrome translates to Warmachine perfectly; I've seen it be the undoing of many a tight game. You try to plot out that last ditch assassination run, you're down on time and can't play the long game. You end up spending just a little too long on the planning stage and clock out before you can clinch the game. Often, the things that cause this event are small things that are easily curtailed through practices early stages.

Playing Practised

One of the things new and veteran players alike fail to respect when playing Warmachine is the importance of a planned and practised deployment and first moves strategy. Some things will happen the same way every game. For example, an Amon or a Vyros1 list will almost always deploy the same way, as neither list truly cares about which pieces it loses, nor about the terrain thanks to mobility. Furthermore, certain things always occur in the same way. For example, Amon's Choir will always walk forward, put a prayer on 'jacks, and then reposition forward. With these things in mind, these simpler lists can strive to complete their deployment within a minute. Well practised players can complete their first turn in just two minutes, often meaning they've completed their first turn with a 5 minute lead on their unpractised competition.

Playing Clean

But, practise isn't just pure board positioning. Sometimes it's having the values you need to know in your head consistently. It seems like such a small time waiting for your opponent to look up his defence, but you could be surprised to learn how much time an inexperienced player might wast trying to determine what he needs to hit a target, or to damage it. You can see this in good players, as they can go to roll an attack out without even having to ask what they need to hit. After a while, you just know what you need to hit that charger. This is something you will learn by simply playing pick ups against a variety of opponents and models, and it is important that when you play these pick up games, you play them timed.

Playing Timed 

I would like to believe the biggest mistake a competitive player could make is not playing casual pick up games on death-clock. I don't play casuals on death-clock (except if I play Haley3, where I force myself to play clock in order to get the discipline to play her quickly), but unlike someone who's reading this in order to learn how to play your time efficiently, I don't play slowly. In fact, an opponent has more than once told me I play and talk to quickly on timed turns. So, if you struggle under time pressure, I highly recommend playing your games timed. Not just a few, or against comfort opponents, all of them.Not only will this improve you through practise and experience, but it will also teach you the value of decisiveness. 

A side note, If your opponent isn't up to play timed games, that's OK. You can just say to your opponent that you would like to time yourself, and that he doesn't have to be bound by the clock. Most players will be compliant about swapping the clock and give you no issue.

Playing Decisive 

Probably the biggest thing players who struggle with death-clock need to learn is to play decisive. Decide on a plan of action and play it out quickly. If you're going for an assassination run, do everything necessary to facilitate the run, and then try to follow through. If it fails, then plan out further actions. Another big thing to learn is not to tilt if your plan gets screwed up, or if you make a mistake. You compound your mistakes by ruminating on them and it is often best to laugh it off and look at a new plan of action. The less time you spend crying over split dice the more time you can cram full of activation goodness.

Conclusion

Playing under clock is probably the most beautiful thing about truly competitive turn based games. It forces players to play quickly and can really improve overall player involvement as it takes less time between each turn. The other value to mention when playing clocked or quickly, is that you can play more games in the time - I  can often get in four games in a day if I'm playing from midday to nine in the evening, and it's led to me being far faster at the game than my play quality would allow. 

There are limitations to consider, of course, for example, being to decisive can lead to you being an idiot. I am an idiot. I've several times had clear assassination runs, but tried to play too fast and missed out on easy wins against good opponents. So, take everything here with a grain; it's important to play quickly, but it's also important to play well. Just remember that you don't have to trade one to have the other. 

Wednesday, 8 April 2015

The Importance of Spot Colours

Preface: 

Have you ever looked at a technically well painted miniature or drawn image, and thought "It's missing something"? Even true to life models, which are weathered down to the anus of every man, need some colour to make them pop. There's an episode of Everybody Loves Raymond, where Raymond's father sets out to paint Raymond's house. He decides on a yellow colour, much to the aghast of the extended family. It turns out Frank (Raymond's father) chose yellow because it made the house pop on the block. Needless to say you never actually see the house, but the episode really rung with me as a mediocre model painter who requires tricks to get around his limitations.This isn't so much a tutorial as a short diatribe on why all miniatures should aim to have some colour: 

My Examples: 

I painted a set of models today, 3 bunkers designed to be Viet Cong Bunkers for games I'm planning.
the obvious spot colour here is the red. Now unless you're colour blind (old mate Josh can fuck off) the first thing you're gonna be drawn to is the red tarp flowing off the side of the roof. Unfortunately, that's the only real spot colour on here. So, oddly enough, the basing becomes the spot colour. The other models are predominantly brownish aside from the corrugated iron roofing on the one bunker, so the grass becomes those part's spot colour that makes them Pop. 

This tau is a model I produced a long time ago, I'm not sure how well it has come out, b ut the first thing most people will notice is the orange and yellow pattern on the helm and target locks of the battlesuit. They are bright, out of place colours that once again, make them Pop. 

Examples from Video Games: 

This is also evident in a few video games, especially from the 8-32bit era, and especially prevalent within sidescrollers such as castlevania one and two, pictured below. 

In this example, the spot colours are the two player characters which share a slightly red, orange palette that makes them easily identifiable to the player. The other easily identifiable object on the field in the first screen are the enemies, which have a bright lilac colour palette designed to make them easily identifiable to the player. The Royal blue spot colour on the orb in the second image makes it easily identifiable as a quest item. Once again, the player is not going to perceive the skeletons as an enemy because they're not bright and colourful against the palette. 

The Best Colours for spots:


The best colour for your spot colour depends on your primary and secondary colours. Your primary colour will usually be a green, blue or grey (although fantasy gives room for changing this) so your secondary colour will be red for the first two and a black for the second. Good spot colours for green/red are yellow and orange, and green or white make good spot colours for blue/red. Grey usually has white or red highlights, although given the neutral nature of grey you can use almost any vibrant colour for spot colours.

I hope this might have helped someone with seeing the value of spot colours when painting miniatures. As always, if you have any questions, comments, critiques, anecdotes or just want to shoot the shit, you can contact me at robindeoliveira@gmail.com. 

Bonus round: 

Comment how many times you count the word pop! If you get it right, you'll get a prize. Here's a hint: The prize; It's like a lightbulb, it's pretty cool.

Friday, 3 April 2015

Basing Tutorial 1: Magnetizing a base.

Preface:

So, you've made the dive into 15mm, or you just want a model that can be based on multiple surfaces. Maybe, you just want your units to all sit on a single piece of plastic duirng transport. Whether you're putting models to bases so they can be removed as casualties, or doing it because fucking magnets, this simple process can cut down the time spent magnetizing immensely. 

Materials 

  1. A drill with sufficint fitting for a 7/64" (27.7mm)  drill bit. 
  2. Enough Magnets that are slightly larger than 7/64" for each model. IF you are magnetizing a 28mm model, or a model not based on a washer, you will need two magnets per model (the magnets being used here are ~30mm wide.) Obviously these should be small magnets, and these are usually called rare earth magnets. 
  3. Bases for magnetizing. 
    1. Movement trays if you're doing 28mm Historicals/fantasy
  4. A pair of flat-nosed pliers. The flat must be slightly larger than the magnet you're using. IT should also be magnetic to make this so much easier.
  5. A knife, because you're going to need to clean plastic. I suggest an standard blade, I did this with a curved blade and it was a pain in the neck to clean the magnet holes. 
Optional Items
  • Super glue: When done properly, these magnets will be in so firmly that you will need real force to pull them out. That is to say, you shouldn't be able to do it unless you intend to do so. 
  • Polar Magnet: Not necessary, but a good, large magnet will allow you to check the polarity of your new magnetic bases. Pick a side, and make sure that all your magnets stick to it.
  • Camera: So you can steal this tutorial, and make it your own, you view-loving whore. 

Steps 

Step 1. Drill your holes 
This step is as simple as it sounds. Drill holes at a perpendicular line to your plastic base. Repeat as many times as required. Try to keep the drill exactly perpendicular to the base, as this give you a flush finish. Considering doing it into a board or table. 

About the only notable concern here is, (as I'm naughtily not doing in the image above) that you should drill into the rear of the base, rather than the top face. This means that the bit will not penetrate where your magnet will sit, and may mean the magnet will sit just a little more snugly. 

When doing this to both a squad/regiment base and a model's individual base, do the base first, then do the regimental base. For doing this, I suggest using flat bases rather than the raised GW bases. Rendedra produces great flat green bases that are perfect for this purpose.

This is most of the work. IF you want to be very careful, you might consider measuring and accurately defining where your magnets will end up, but I haven't done this as I was basing 15mm vietnam war infantry, who understandably didn't tend to fight in formation. 


Step 2. Clean the base
You've worked with plastics before if you're here, so I don't know why I'm telling you this. Maybe this process is just so simple and I wanted an extra step? Who knows. I'm clearly just a wanker. So, cut away any remaining plastic. IT's worth noting that you should absolutely avoid widening the hole at all when you do this, so be careful and avoid files unless you're using them flat against the surface of the base. 


Step 3.Fit your magnetsThis step is optional. I used my pliers to effectively jam the magnet into place so that when I put them in flush, it was less of a mission. Having a magnetized set of pliers helps here, as the magnet can be attached to the pliers then pressed into the hole. You will not believe how much easier this makes the whole process unless you've worked with magnets before. 


Step 4. Put magnets in flushThis step is the most important, but arguably the most fun. I tried two methods to complete this task. Both worked well enough. The first is to use the butt of your craft knife to gently press the magnet into place, as seen in the image to the left. You should do this until you can rub your thumb across the face of the base and not feel the magnet in place. 

The second method is to use your flat nose pliers to do pretty much the same thing. I found this method quicker as it meant that I didn't have to do the step prior to this one to complete it. It can be a little more difficult to aim with, though. Once again, the facing should be flush. IF you can't run your thumb across it you haven't done it well enough and should repeat the pressing. This is especially important with regimental bases where models that are sitting on top of a magnet will be very noticeable. 


Additional step

Apply superglue lightly over the top, or epoxy putty if you prefer and you're as safe as rain in england in terms of the magnets staying in place. just remember to make sure that they sit flushly! 


If you have any question, comments, critiques or humourous anecdotes, feel free to leave a comment or email me at robindeoliveira@gmail.com


Saturday, 14 March 2015

The reasons for a hiatus

Preface:

Hello dear reader,

IF you're reading this, you're probably wondering why (or, I've shamelessly advertised to you about it because I'm a view monger) I've had such a lengthy hiatus from writing anything serious about wargaming. I had a long list of Bolt-action related topics to write about, with four or five months of world war history resources planned. I intended to get into some of the seventh edition codexes, citing the success of my review of the Space Marine Codex for my reason for this.

Unfortunately, none of this panned out. I'm a bastard. I know. My mother told me so.

In the time since my last post, I've had a turbulent relationship with my once strongly held hobby. Like a theist falling out of faith, I fell out of interest pretty heavily with warhammer and other well established wargames like Bolt Action, eventually becoming something of a pessimist about the hobby as a whole.

I specify established wargames for a reason. My hiatus gave me a chance to realize why it really was that I didn't like wargaming: It was a shock. I didn't dislike wargaming. I fucking loved it. I loved rolling lots of dice. I loved watching my opponent roll lots of dice. I loved moving miniatures around a table like the neck bearded armchair general that I am. It made me realize something else. I didn't feel burned out because wargaming was losing its place in my spare time, I felt burned out because I never got to play something that reflected what I felt about the genres.

The Ancients Wargame Phase


I had a look at some of the lesser established or 'retro' wargames. A local store owner and wargamer, (the owner of Emperor's Legions in Brisbane, Australia) introduced me to Warhammer Ancients. (for full disclosure purposes, I've never played the game. I've read the rules though.) This got me to realise that I really liked ancients as a wargaming concept. It figured, I played wargames on my PC religiously. Games such as the Total War Series, any turn based game I could get my hands on and even the thoroughly despised Jagged Alliance: Back in Action game. I realised that I really liked these games because I could play them at least partially to my own rules, with nobody else's input forcing me to do anything. So I did what any sane person who hadn't found his niche wargame would do: I made my own game. My parents, as caring and supportive as they pretend to be of my irritating hobby, had a great comment on the matter of rules made by me. They said that "It didn't matter what the rules are, just so long as I win because of them."  Affectionately titled Marches of Rome, then Shield of Rome and using a working title of ANCIENT BATTLES GAME DO NOT DELETE YOU ARSEHOLE.doc, this game became my first fully fledged gaming product that I managed to dupe one of my friends into playing.

It doesn't matter what the rules are, just so long as I win.
We had a blast, being completely confused by how the rules forced spearmen to outperform swordsmen in a charge, watching with dismay as many units crumbled after just a few hundred dice were rolled. I got to writing supplements, codexes so that my friends could play factions that they liked. In fact, when asked about the codex I promised him a friend said "Look dude, I just want my ancient Spanish." The game had some phenomenally unique mechanics, such as literally hundreds of dice being rolled to cause the death of just one man, battle lines being drawn and then shifted, seemingly at random, units breaking from an engagement only to be chased down and then emerge victorious after being charged in their rear, and the resource management that was the per-unit dice pool. 

The game shamelessly stole elements from Hail Caesar from Warlord Games, expanding on the command system in that game  to include the chance that the messenger got shot on the way there. IT stole points costing from SAGA From tomahawk Studios, as well as something resembling the points and fatigue systems from that game to create something of a grand battlefield strategy game with the most micromanagement one could possibly include in a four hour wargame. It was glorious, and I loved it like a son. Then, I realized it still wasn't what I wanted.

After that, I underwent a period of vacuousness. I played no wargames and tried to create nothing. I had truly burnt out. After a few weeks, one of my wargaming buddies organised a fifth edition Dungeons and Dragons Campaign. I was immediately taken in by the "do whatever you want" attitude my DM took and I was excited by the prospect of doing stupid shit like swearing at my opponent rather than actually acting. IT occurred to me that this is what my wargames lacked: a player input system. Wargames differ from pen and paper RPGs in that they tend to have very well defined rulesets with no holes in them, (we speak in ideal terms as wargamers). RPGs tend to have well written rules, but have a different goal. They don't give players a direct route from A to B to resolution, but a framework for players to define what A and B are, and the GM as their only opponent to this. I thought "I could do this shit" and so I tried. I felt a pang of discomfort at relinquishing control unto some grubby-fingered player, but I realised that that's what I was looking for in a games system, and if nobody was going to write it, I might as well have a crack at my stupid dream. 

GREY AREAS


The end result was a counter-terrorism and hostage situation game, focused on not forcing the GM to follow some strict rules, and allowing lateral or "out of the box" thinking by the players and the GM. I did a lot of research about domestic gun fighting, researched dozens of hostage situations and SWAT-equivalent tactics and equipment to decide on my rules sets.  I often felt paranoid that ASIO (Australia's CIA) Was watching me and just waiting for me to ask a question about going to the Levant.)

The game took me into a new scale, and a new idea of how wargames should happen. Rather than being a turn based simulation of battle, the game I Created [Codename: GREY AREAS] was a cross between a wargame and an RPG. Players had set missions, distances and weapons like in a wargame, but the ability to think laterally, characterfully and interactively like an RPG. A big focus was on making a negotiation system that allowed players to do more than roll a dodecahedron and hope for the best. The final system I Developed left a lot of the details up to the GM: You, as the GM decide  whether your player makes a fitting argument based on a few pieces of information provided by the character sheet of the boss or organisation you're negotiating as. Combat was designed to be quick, unforgiving and brutal, but was eventually scaled back with the inclusion of an HP bar. It remained uncomplicated and designed so that when well planned, players could execute their mission without ever having a single shot fired at them. The game was mechanically like a ballerina or gymnast; it was flexible and graceful. I was happy with what I had done. 

After a while I began to focus on how to bring the project to life. Miniatures are the heart of any wargame, but RPGs care much less. Rather than settle on whiteboards and circles, I decided to go the whole hog and use setpiece terrain designed to immerse the player in a specific location. 4ground terrain was fantastic for this, and my friend at The Last Stand in Brisbane was very generous with his discounting of the products so that I could actually afford it. This left me with a lot of buildings with intricate, doll-house like levels that were accessible from the top down. I built doors into them and walls so that I could make specific rooms. Most of all I needed good miniatures to support my game with, and I found some fantastic generic yet so specific it hurt 15mm miniatures from a company in America called Rebel Minis. It gave me some simple, miniatures reminiscent of the people that supplemented the tanks of the micromachines franchise to play around with. 

I have played but one game of this system, but I thoroughly enjoyed being the villain, and I hope that through a subsequent campaign I can create a game where my friends and I can play imaginatively, with rules designed to give form rather than structure, while still being stiff enough to play like a wargame. 

It'd be cliche to call myself a madman now, wouldn't it?

The Future

For the time being, my future is uncertain in wargaming. I will definitely continue to go and play wargames, although I am still very much on hiatus from competitive wargames. I've spelled my time with card and board games (I am fiendishly fond of Coup, which is a great card game reminiscent of bullshit), computer games and Pokemon. (Yeah, Competitive fucking Pokemon.) I've even been tossing up starting my own youtube channel, although I'm doubtful I have the presence of mind to do 15-20 minute videos like some of the great youtubers I waste too much time on. Whatever happens in the future, I Can only draw three certainties: 

  1. I will continue to make broken rules that suit my creative needs as a gaming butterfly
  2. I will continue to play wargames. 
  3. I will continue to use this blog to augment my own hobby and bring it to new heights. 

I appreciate your reading this, fair-weathered reader. Your view means as much to me as my quirky sense of humour must mean to you, and that's not boding well for ether of us. 


Saturday, 20 September 2014

German Squad makeup during the war.

Preface

So chaps, I'm sure you all get the idea here. I write stuff, you believe stuff blindly, then use stuff in games as fact only to have someone far brighter than me show you why I was wrong. that's history, right? Pretty much. I make no guarantee that any of this stuff can't be proven wrong, especially with the minor powers of each side. In this post, I will look at how a (at the very least, especially with the smaller armies) regular infantry section  would be deployed at full strength given no casualties or manpower shortages. I plan to include equipment and the roles of individuals within the squads. Among other things, including a few notes on how effectively this worked. Since the German's had a number of different units in the action during the war, I'll try to cover most of them. 


The Heer Gruppe (Early War) 

Squad Strength: 
9 men

NCOs: 
Squad Leader (Feldwebel or Unterfeldewebel, usually the latter.)
Deputy Squad Leader (Unteroffizer, usually.)

Loadout:
3 MP40s
5 Kar98 Rifles
1 MG34

Both squad leaders would have an MP40, as well as a third man. 5 men would be armed with rifles, the fifth being the MG34's loader.

The Heer Gruppe was relatively effective as a fighting unit and this often meant that most German units were built off of it. The Standard Waffen SS squad for example, had very similar makeup to the standard infantry, only having access to slightly better equipment and generally more experienced soldiers. 

The Grenadier Gruppe (Late War)
From what I've read, the Grenadier Gruppe was simply a renaming of the earlier Heer gruppe, the way the Bolt Action Sourcebook describes it, an efford to improve the esprit de corps of the Wehrmacht. While minor (official) equipment improvements did occur, such as Assault rifles started to be used in some number, G43 semi-automatic rifles floated around the units, nothing major changed to impact the organisational structure of German infantry gruppes. Of  course, bolt action rather conveniently uses the grenadier gruppe as the dividing line between units having access to panzerfausts and assault rifles or not. 

Basically, Add "Panzerfausts and STG44s" onto the above list - Since the STG44 was a marriage of rifle and sub machine gun, it is not unreasonable that some squad may conceivably have access to enough assault rifles to equip every man - a rare occurrence, to say the least! If only a small number should have STG44s, the men with Sub machineguns should get them first - so, the NCO and the Deputy, then the third bloke with an MP40.

Fallschirmjager Squads

Fallschirmjager squads were armed differently to the Heer as they were paratroops. This is mirrored in the example of American Paratroops, who used shorter rifles and lighter anti-tank weaponry. Realistically, every piece of differing equipment given to the paratrooper was designed to be suitable for him to make the drop most effectively. Fallschirmjager squads still made use of every kind of weapon that was available to the average heer gruppe, even having certain equipment that could be considered better.

Pioneer Squads

Pioneers squads were usually the same size as a german  Heer squads. Their equipment differed quite substantially, having all manner of exotic and fantastic weapons available to them. Given their role as combat engineers, Pioneers would have a higher propensity to being armed with explosives, flamethrowers and Sub machine guns. 

Panzergrenadiers Gruppe

Squad Size
12 men

NCOs
Squad Leader 
Deputy Squad Leader

Loadout
1 MP40
7 Kar98 Rifles
2 MG34's
2 Lugers
Panzerfausts

This standard loadout was used for the Average Panzergrenadier squad. Note that, because Panzergrenadiers weren't usually intended for assault or breakthrough operations (that, they left to the armour), so would really be used to protect the Flanks of the Tanks and screen certain zones too dangerous for the Tanks to enter. As a result, most combat situations didn't call for effective close assault proficiency. This is why there is a higher proportion of rifles when compared to the standard Heer squad. Later in the war, Panzergrenadiers became something of a mobile reserve force. By this time, they would be armed in a manner much closer to the methods of the standard Heer squad.

Late War irregularities 

As the war dragged on, the Germans started to sacrifice quality and quantity within their squads. A squad that once advanced as a twelve man unit now moved as a 7 man unit, and a unit of Luftwaffe infantry were made up of mechanics and technicians pressed into service desperately because of manpower shortages. Some units - such as the Waffen SS Florian Geyer - the cavalry, literally, were defeated to a man and were not available for the fall of Berlin. However, The Armies of Germany theatre selectors do a good job of making these units unavailable at the right time - for example, it stops you taking assault rifles at the invasion of Poland! 

Outgoing

These aren't all the units that germany had differing organisations for - unfortunately, I don't have the time or resources to research much more in depth than I did for this article. However, I'm always happy to answer any questions presented to me. Feel free to leave me a comment, critique or question, or if you feel like you'd prefer to speak to me personally, please e-mail diaord@hotmail.com. 

Monday, 15 September 2014

Bolt Action 101: The Very Basics:

Preface

So, you've decided to make a change. 40k's feeling stale, or maybe you just want to play something that's grounded in reality. Maybe, you just want to play something that doesn't force you to get wailed on before you get a chance to play. Whatever the story, I hope you come to Bolt Action looking for fun and not for balance. While BA is at its very core very balanced, there are certain tools, and certain units which are unreasonably priced. Certain weapons do an unreasonable amount of hurt when they hit, but everyone can take them.  


The good news is that Bolt action will be familiar to the new player who's played 40k, while still playing differently enough to feel vital and enjoyable. To put it in analogy, Imagine Bolt Action like changing the flavour of your cereal choice; It's familiar while being still being fresh. 

The Order System 

The Order System is only the second biggest part of Bolt action, but it's clearly the more necessary to discuss first up. In bolt Action, each player has a pool of 'Order Dice'. These are usually specially printed dice that are used to indicate the action that unit has taken (if and when it takes that action.) While any dice that are the same size and style will do, using the actual order dice is very useful - it's also important that they differ in colour, as we'll get to later. 

Now, let's have a look at the way Activating units works. No player "Goes first" as such in bolt action - one player takes the first action. An Action is literally giving orders to a unit. Anything from ordering it to shit its pants and hit the deck to firing on a number of targets and giving coordinates for an artillery or aerial strike. Who gets to take the first action is defined by putting all dice into a cup (or pouch) and having a player draw a dice from the bag. if that dice is his colour, he takes an action, with the opposite being true. While this can lead long streaks of one player getting multiple turns, but this usually means the other player will get more turns. Finally, this also has the awesome effect of allowing players to do quick fractional math to get the odds of them going next or in future turns - something I tend to really enjoy. The only downside of this system is that it gives an advantage to the player who runs multiple units, rather than allowing units to take larger units and bigger tanks. 

Finally, let's look at what can be done during a player's action. There are 6 potential orders - convenient, given the number of dice sides that exist. These six are: Advance Ambush, Down, Fire, Rally, Run, 

  • Avance lets your unit move a short distance, doing neither at full effectiveness. Some units cannot move and fire even when Advancing, others can fire effectively on the move. 
  • Ambush lets your unit forgo acting to instead interrupt an enemy unit's action - useful for keeping units pinned in place, or forcing them to move into range when used in conjunction with things that fire indirectly (see: Shooting)
  • Down is like going to ground in 40k - it gives the player a slight cover bonus, and allows them to recover one pinning marker. (read: Pinning) It's also used to represent units that have forgone actions.
  • Fire: Exactly what it sounds like. Lets the soldier fire at full effectiveness. This is the order for units that can't move and shoot. 
  • Rally: This interesting order allows the player to forgo an action to increase the squad's morale. This one isn't the most used, and when you want it to go off it probably won't but it is the most tactically overlooked order of the six. 
  • Run: This lets units move at double the rate they would advance at. Of course, they can't fire while doing this. Run is also used to represent charging.
Note that every unit only gets the one action per turn (with some notable exceptions) so don't expect a unit to move on activation then fire another - they do all their action to moment you put that order dice down. 

Pinning 

Now We'll look at Bolt Action's (excellent) take on pinning. Before you read this, throw out everything you understand about pinning in 40k. To put it politely, 40k pretends pinning is an occasional thing. This game sees it as the centre of combat, where it belongs.

Let's start at the beginning. Because you need to know it to proceed, units have a morale value dependent on their quality. Experienced soldiers have a value of 10, Regular, trained soldiers that have seen little or some combat have a value of 9. Irregular (inexperienced) or hastily trained soldiers have a value of 8. Every time a unit is given an order, they must roll a morale check (the same as 40k's leadership checks), passing this automatically (unless excepted) if they have no pinning markers on them. These are used in the same way as 40k, although you should think of a unit with morale 10 as being about morale 8 in 40k. Even putting a single pinning marker on a unit is enough to force down their chance of acting that turn quite significantly - Even the most veteran of infantry with one pin are reduced to only completing an order 5/6 times they try to act. IF they fail this test, they go 'down' and do nothing, getting a small bonus for it. Finally, it's worth noting two further things: A soldier who has his morale reduced to 0 or lower (after all modifiers)  is automatically defeated and removed from play, meaning you can destroy a squad without killing a man. The second is that even should a unit that is pinned pass a morale check, if they still have pin markers on them they will not shoot as effectively as they could have otherwise. 

The reverse of this is that a unit that acts out an order automatically loses a single pin marker - more if they rally. This means putting multiple pin markers on units becomes imperative. With three pin markers on it, a unit will be rendered basically ineffective. Stay out of assault range (read: combat) and that unit will probably not act effectively. Just remember, every turn they go down they drop a pin marker, meaning that you should continue to put a bit of firepower on dangerous squads so they're out for the whole game, or at least ineffective for the whole game. 

Shooting 

Now, I know what you're thinking. "So we've looked at orders and at pinning, okay! Let's get to the meat of this game: killing stuff!" Unfortunately, you're wrong if you're thinking this. While it is possible to annihilate your opponent, rarely is it the aim of the game (y'know, like real wars?) and playing even two games of Bolt Action you will realise this very quickly. The first thing to know about Shooting in Bolt Action is the system, so I will start there. After that, the effects will be discussed and we will finish with what you should aim to accomplish by shooting at something.

The first thing is that All units technically hit on a 3+. In a perfect world, where no modifiers apply every unit would hit 67% of the time. Of course, modifiers exist. Most detract from your chance to hit - pinning, experience, long range, cover and movement all have a negative impact on shooting, with there only being one universal bonus and only one unit that gets a bonus outside of that. On Average, a rifle team will be hitting on 5's, so this should be the baseline when deciding how well a squad should perform when shooting (6's for inexperienced units) It's worth noting that a unit can still hit if he would have to hit on better than a 6+, this becomes the astronomically small 6+/6+ - 2.7% chance, and you can hit on these odds for to hit rolls that would equate to 7, 8 or 9+, so once you must enter the realm of 6+/6+, don't be afraid of shoving yourself even further up that tree. After units have hit, they need to wound. This is done in a sense familiar to 40k. When shooting at infantry, 3's are needed to wound inexperienced soldiers, 4's for regulars and 5's veterans. 6's, and better to wound values exist, but these are saved for special units and vehicles so I won't comment on them here. Unlike 40k, weapons don't have a strength value, instead, certain weapons (heavy weapons - anything capable of scratching light armour at the very least) wound targets on slightly to extremely well compared to small arms (which use the natural to wound values, being unable to harm 7+ or better).

While all units can potentially take a casualty or damage from a hit from a weapon, any unit hit by a weapon will take a pin (not always the case with armour, but this is a different story) marker regardless of whether they take a casualty/damage or not. This means putting three units hitting on 5's rolling at least 3 dice each should put 3 pins on a target, which is ideal. If you do no damage but put 3 pins on a unit, you've done enough for a turn. If you do manage to reduce a squad's size, aim to reduce it below 50%, or to one man for special weapon teams. upon being reduced to these sizes, squads become less efficient and less likely to pass morale checks. You also take morale checks more often, some of which can result in the unit being destroyed without taking further casualties.

To summarise, shooting should not be used to completely destroy units - put 2 at the least, 4 at the most pins on a target and move on. It will be shut down, or at least, ineffective for the next turn. Remember to service each of your opponents important units with at least 2-3 pins and you will shut them down for the whole game. 

Combat 

Combat in 40k is extremely cut and thrust. Units are usually defeated at the end of a combat and for the most part, they die immediately. The same is true in bolt action, although bolt action refuses to allow players the satisfaction of simply tying up another unit. With the exception of vehicular combat, combats are over in one action, period. 

In this section we will look at how a unit is given the order and completes a charge. One orders a unit to charge by giving the run order. The unit can then charge up to 12" (more for cavalry - yes, there are polish lancers and Florian Geyer Cavalry!) or 6" if moving through rough terrain. Unless the defender is defending a wall or similar barrier, the charger always strikes first. Of course, the defender can take a number of actions, assuming it has not already acted that turn (and the charging unit is not too close!), and assuming it passes its order test, the unit may fire on the target in the same way as overwatch in 40k. Except, that this shooting is done without the dumb "snap shots" rules and treats this shooting attack as just another fire order. All normal modifiers apply. Assuming the squad is in range and is not destroyed by overwatch, it charges into base contact and then the combat is fought.

Now, how to kill soldiers in combat: Every model from the attacking side rolls a single dice (more in certain situations). If this dice scores well enough to wound the target - remember, 3+ for inexperienced, 4+ for regulars and 5+ for veterans. There is no roll to hit. Casualties are removed and (unless fighting over a barrier) don't get to fight back. The player who takes more casualties is the loser, and unless he has a special rule  that states otherwise, is destroyed. If the two sides tie, they re-fight to combat until one side wins - there are no ongoing combats.

There is one interesting rule that is intertwined with the combat rules, and it becomes the central reason that non-beatstick (hint: they exist) squads might charge into combat. This is the rule that states that a unit that is in combat loses all of its pins. If you have a full or high strength unit, and need it to shake its pins, then you may charge it to another unit (preferably one it will beat in combat) and remove all of its pin markers as a result. This does remove the target's pin markers too, meaning that you have to be sure you'll win if charging a unit that has pins on it. 

Also, charging simply is more effective at causing casualties. While it does ensure you take some casualties in return, you reduce your chance of whiffing by the number of to hit rolls you would've failed - pin markers don't matter in combat, and there are no to hit rolls so you're just relying on quantity and quality in that fight.

Similarities to 40k 

So, everyone already knows Bolt Action is made by the same guys who wrote 40k and its supplemental work. There's Cavatore, Priestly and many more fine writers from the old days. 40k shares with bolt action the 12" mentality, the D6 centrality and the points system. Realistically, the similarities end there. There are next to no saves in bolt action, there are modifiers, combat is different and more extreme, and the game is usually smaller. It's just altogether very tactical. Unlike 40k, you shouldn't be looking for the turn 4 table army, but at the army that can hold its shit while breaking its opponents. Sure, Bolt action is a little broken. The Finnish seem to get every rule from here to the sun, and flamethrowers are god mode, and buildings can only be destroyed by high explosives. Armour has real survivability and its price is extreme to cover this fact. Where a Rhino is about two and a half the price of a space marine, a Hanomag - the quintessential halftrack - is 9 times the price of a regular panzergrenadier - and it can't even shoot unless there's someone there manning the thing. 

Different ideologies also exist in bolt action. Units aren't forced to shoot their anti tank weapons to the exclusion of their rifles, and tanks can target multiple units if they have multiple weapons, bullets don't stop flying because they hit the edge of their range, because this is not the Call of Duty of Wargaming. These all add up to make bolt action just a little fresher than 40k. While there  are still "that's dumb" moments, most of the rules seem like moves in the right direction when compared to 40k. Some things are frustrating and confusing, especially with pricing - for example, a StuG III costs 230 points, while a Pz IV costs 235. For 5 points, a Pz IV has a turret mounted gun of the same caliber, (huge, since tanks can't pivot on the spot normally), and a coaxial MMG. While the Pz. IV Can't fire both the Coax and the main gun at the same time, having access to the coax means that it can put more pins on targets more reliably than shooting its main gun. Another example of this is the two Multiple rocket Launcher half-track variants available to the Germans. The Panzerwerfer is 115 points, 130 with an MMG. For this, it's 7+ with a 360 degree multiple rocket launcher (read on later to understand how these work.) The Stuka Zu Fuss, however, is exactly the same - 130 points for a 7+ chassis with an MMG and MRL. However, in this case the MRL is limited to the front arc. It's small, but it's unaccounted for and that frustrates me. 

Missions 

The missions for Bolt Action are frustrating. They aren't really designed not to be developed upon and are more of a template than something you can play a pickup game with. As such, there's only one mission suitable for pickup games, and that one doesn't suit all army's at least reasonably, severly hurting certain army builds. This means tournaments have to make their own missions to allow players to get a fair game out of it, and can be limiting in playing with people you aren't mates with. 

Armour and the Focus

I've left Armour until the last, and coupled it with the Focus for a good reason. It wasn't and isn't the focus of this entry, or of bolt action. The humble foot soldier will do most of your work, and pins are the focus of this game.

Anyway, there are a couple notes on tanks. First of all all kinds of vehicles are represented, with different armour values. Soft skinned vehicles, Jeeps and trucks are wounded by any weapon - rifles, anti-tank guns and flamethrowers - on a 6+ (before modifiers). Lightly armoured vehicles like early tanks, armoured cars and half tracks have an armour value of 7+, so need to be penned (like 40k). As an example, a LAT (Light Anti-tank gun) has a 4+ to pen, so needs a 3 to do superficial damage (a glance) and a 4 to do a pen. (Again, familiar to 40k.) A Light tank is an 8+, and this goes up to 11+ - 11+ are Super heavy tanks and are saved for the likes of the King Tiger and other Extremely heavily armored tanks.

Part of what makes tanks so necessarily expensive is that they live forever. Not literally, of course, but you would be getting very unlucky to lose a 9+ vehicle before turn 4 an 11+ tank shouldn't die unless it gets assaulted or you screw up pretty badly. This makes tanks seem worthwhile, if a little expensive, in bolt action. Remember they won't ever be the focus of your game, so you shouldn't load up on them.

So, what is the focus then? Is it the heavy weapons teams, the artillery, the challenge caddy officers that totally must exist? No. The focus is the grunts. Where it belongs. An army that consists of 12 order dice, 10 infantry squads of 8 men and 2 officers (about 1,100 points) is solid. An army of 40 men with some good reinforcement is solid. There is no ultimate build, although there is efficiency. Regardless of the list's design, troops will be important.  

Final Statement

Bolt action is a move in the right direction. By right, I mean that it is a good, sideways swap from 40k. You will still feel like you're playing something you've played before, but you won't ever feel like you're playing something as hopelessly broken as 40k. I make no illusions that this game has no holes. IT has them. You can exploit them. But you won't win just because you exploit them. Another nice thing I might add, before I leave, is that one can comfortably expect about 30 (plastic) miniatures for the same price as 10 tactical marines. Since about 60 infantry models is enough to make any army up to about 1,250 points, you can be playing a full-size game after dropping as little as $200 - 80 AUD for books and maybe $120 AUD for 2 boxes and some extras.

I invite anyone to try bolt action, and I would love to hear from you if you have any questions. Over the next few months I plan on releasing a series of posts focusing on the game's many facets, then going through the units of each army. Posts like this one would be regularly produced on Mondays, while a 'history resource' - literally something to allow players to write lists that are more historically charged - will be produced on a Friday. These will be kept in a page for easy access like my 40k codex reviews and should hopefully allow people to read enough to have a holistic understanding of bolt action.

As I Said, I welcome comments, criticism, questions and requests. I relish in it, in fact. Please feel free to leave a comment below, or if you don't wish to comment publicly feel free to contact me at diaord@hotmail.com To find out more about Bolt Action, click here. 

Saturday, 23 August 2014

A movement away from 40k

Preface

So pretty much any of my adherents will notice this blog has not been maintained until now. And, I'm going to apologise for that. I know how much my ramblings meant to the many of you. I don't feel like I can continue to make genuinely modern and aware posts about 40k, and I am burnt out painting the stuff. Here's what to expect in the future.

What does this mean for the Painted Dice

I'm down, but not out of wargaming. I am trying to get into Bolt action, having brought a few of my friends into the game. I will be making posts for bolt action similar to the ones seen for 40k. I'll have a focus on the history, and a focus on the game itself. My posts will review the books in a similar manner to the books of 40k I've already done, albeit with different ratings. 

The Future

There will still be 40k, but I can't honestly say I will ever dedicate myself so feverently to 40k as I have at the start of the year and before that. Do expect a return to regular posting, however. I hope nobody minds this change of scenery, and I hope that I might be able to intrigue a few of you into trying something other than the 40k you're so used to. Bolt action is a bright future for me, and as a history lover it promises to bring me as much excitement as 40k once did. I hope, for the future of my interest in wargames, I Can get back some of what I had. I don't know if it's in my hands though.

The future of 40k

Too much has been said about this topic up to date, so I'm limiting myself to four sentences. 

1. 40k is turning ever more into a game about building the most powerful, expensive armies possible. 
2. The second is that the speed of releases means those same releases are losing their flare. 
3. The last Space wolves release sealed the deal for me; space santa claus can keep his plastic miniatures. 
4. I can only hope it improves from here, but I am doubtful.

You will still hear about my exploits playing $40k down the drain, but they will be much less numerous, and I will be much less talkative on that subject. Still, don't hesitate to contact me with questions, opinions and problems. I am more than happy to help any reader and I will do my best to get in touch quickly at any time. To contact me, please email diaord@hotmail.com

Thankyou folks, and for those who only tune in for 40k, Goodbye for now. 

Tuesday, 1 July 2014

7th Edition and Me.

Preface

So this is my first post for july, I figured it best to do it on the tuesday rather than the monday, since I'm not going to recoup my lost adherence for june. So, we'll pretend this book didn't come out a month or two ago, and that it's brand new. Okay? Okay.

My Understanding

As an idea of what I'm going to be talking about, I don't personally think of this as "Seventh Edition". I think of it as "Six Point Seven Five Edition". You're probably rolling your eyes, thinking "God, you pretentious twit, just say 6.5 like everyone else." But, I can give good reason for why I say 6.75 and not 6.5. The first is that 7th edition has a few, huge, radical changes that completely morph the way we build and play our armies. So, I look at 6.75 with hopeful eyes, and expect big things in the future. 

Big Changes for 7th

One of the big changes in sixth was the inclusion of fortifications in the FOC. Now, we have LoW making an appearance. I'm probably never going to personally accept Lords of War in regular games - I realise that GW is doing a damn fine job of shoving them down my throat - they almost succeeded with Ghazkull Thraka (Did I mention I'm starting orks? No? Well, My guard army's almost done), but I along with my gaming group have pretty much stonewalled the idea of playing LoW in regular play. I'm happy to play them above 2k; but I very rarely venture outside of 1999+1 range. 

The other biggest two changes have to be the Maelstrom of War Missions and the related Cards, as well as the psychic phase. The Maelstrom of war missions are a little imbalanced, and force certain armies to sit for turns without objectives to complete - unless you houserule them, which is something one should not have to do. Once houseruled, these MoW objectives become a lot of fun and potentially make sure that armies have to be just that little more than 4 units and a deathstar. Of course MoW was meant for fun games, not competitive play. I don't think anyone disagrees with that. 

The Psychic phase I'm iffy about. I hate Daemonology with a passion, and feel that the Chaotic Daemonology is a bird to the screams for more balance within the ranks of the daemons codex, with the +1 to cover save being the cherry on top to 0 point pink horror squads. If it's not abused (which is altogether far too easy to do), though, it's a relatively balanced system for which we have to give props; It made lower rung psykers like weirdboyz more reliable and tempting while limiting the effectiveness of farseers and ubercasters like Severin Loth.   

Smaller Changes

Of course, this edition also had slight rules changes implemented, such as the very correct change to vector striking and FMC abilities. The Grounding check changes are cold comfort to Blood Thirsters and Khorneate daemon princes who got no bonuses from being FMC. Also, the changes to Moving through cover on the charge were nice. I'm iffy about terrain dataslates, I'm probably gonna stick to the old terrain rules unless warhamz tournaments start getting used to the idea.

The other nice change was that MCs cannot be joined by characters, effectively ending O'vesa star for good. Too bad they forgot to end screamerstar. Oh, they also removed the power of buff ICs like shadowsun; no more 2+ cover on my farsight bomb. 

As we wait on baited breath

No Changes introduced to really improve combat aside from the MTC bonus which only furthered Beast's power as the only real charging unit in the game. They could've given Transports the ability to let their contents charge if they didn't move that turn, but I guess we can't have everything, can we? 

The Result

I guess the Result can be simply put as happiness. Most of the changes were good, and there was a lot of fleshing out done, maybe not enough. They also need to limit us a little more, but they're clearly relying on wargamers not being jerks to do that job for them. Smart move, huh?

Also, Fuck the 1/2 of the page layouts. That really Smarts, G-dub.

Wednesday, 11 June 2014

A lull before the storms

Preface 

hi guys, I haven't been able to post for a long while. I do have a lot of hobby stuff to do; yet with school and 7th ed coming out, I haven't really been able to think tactically about 40k for a while now.
I've a short lull before my one final, and then I have about a month off - the more time to spam this page with thoughts, right? 

Anyway, I just felt I should leave a line so people know what's up - here's what's coming up over the next few weeks. 


The future 

Looking forward, you should be seeing a return to regular posts. I hope to cover a number of topics, but I will intend to take a look at how all my active lists have changed from sixth to seventh, with a special focus on the farsight bomb - who arguably took the biggest nerfs while being able to come back kicking. 

Tactics posts are shaping up to be thus, starting at the latest the week of the 23rd. 

- 7th edition and me. 
- General thoughts on seventh for my area meta. 
- The Psychic Phase and daemonology
- The Farsight Bomb in 7th.
- My Daemon Rush in 7th.
- My guard list and 7th.

Painting should focus on my up and coming escallation league army - an 1850 point guard list which focuses on everything getting stealth or stealth equivalent - +1 to cover saves, My shorthand list is this:

3 LRBT
1 Vanquisher
2 Exterminators

CCS

3 Vets squads

4 Chimeras

Banewolf

5 Sentinels


Outgoing, and apologies

that's all I really have time for today. I havebig plans for the future, and I hope you can be a part of this progress. 

Feel free to drop a line with any questions you have about 7th edition, from a tactics, rules or personal opinion perspective - while I don't have much time for posts, I have enough time to answer any questions I'm asked!

Friday, 16 May 2014

Painting Exhibitions: Flesh Hounds of Khorne

Preface 

My Flesh hounds are made of the fantasy chaos warhound kit - I didn't want to use dire wolves because some of my friends already used them for khymerae. Hopefully these will work. Here's the first ten. 

The List

Bloodthirster of Khorne with Exalted Reward and Greater Reward

Herald of Khorne with Exalted Reward on Juggernaut
2 Heralds of Khorne with Greater and lesser reward, exalted Locus on Juggernaut
Karanak

6 Bloodcrushers with Banner of Blood and Blood Hunter with a lesser reward. 

2 squads of 10 Bloodletters of Khorne, one with bloodreaper

2 squads of 15 Flesh Hounds of Khorne 

Flesh Hounds of Fantasy Chaos Warhounds


Wednesday, 14 May 2014

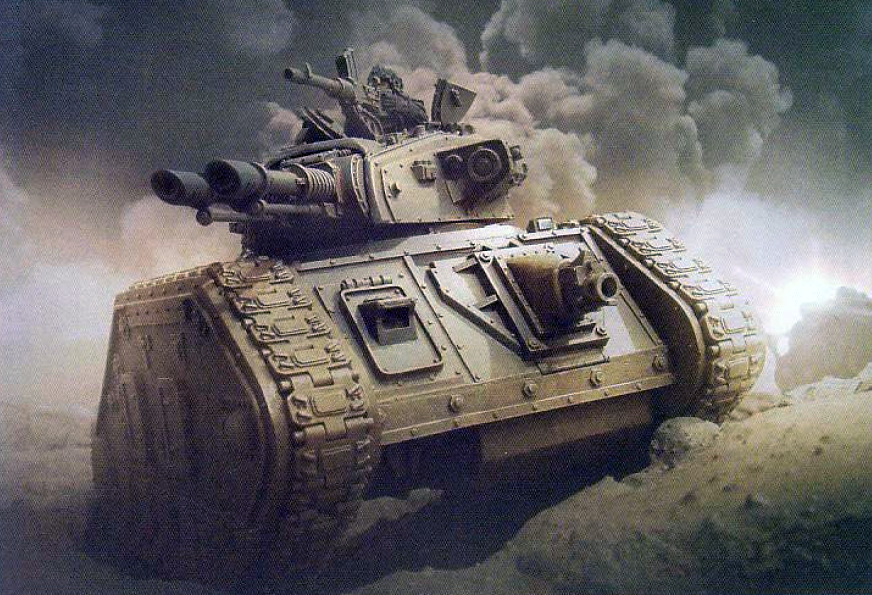
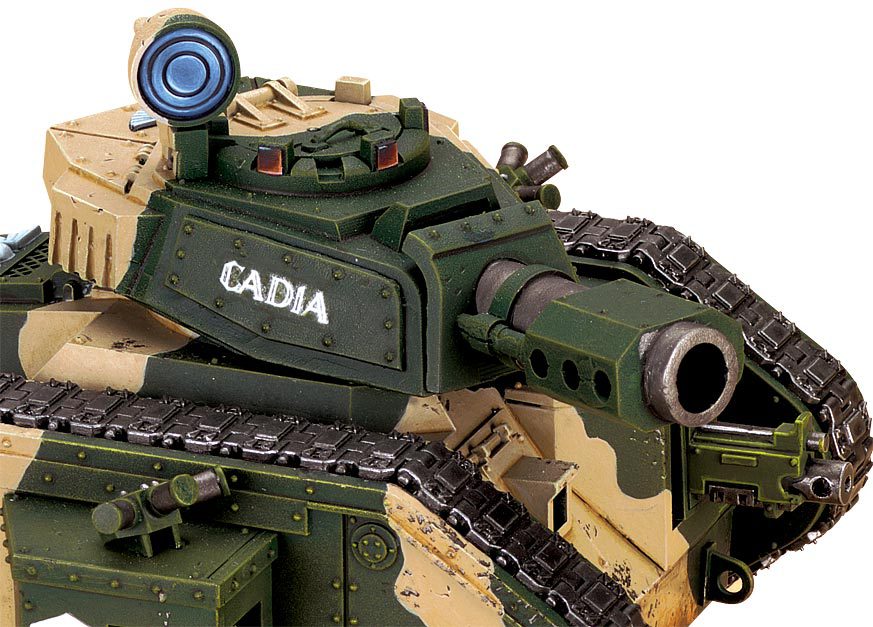
Leman Russ Battletanks: A comparison

Preface 

You knew this was coming, I knew this was coming, let's just try to get through this.

On a more serious note, Once 7th drops, I WILL be doing a review of everyone's favourite spehs army, but only when I have a better idea of what seventh will mean for the army. Once that has dropped, I may also finally do a true review of the tau codex, although I'm not sure if that will be worthwhile at that time.

What kind of tank?

This is a hard one. Any leman russ will constitute a substantial portion of your list, and taking 2-3 of them for a tank commander usually means they'll form the centrepiece of your army. What I suggest is either build your army around the tanks, or build your army less about 180~200 points per tank you'll wanna field. When you've built your army, check what it needs and build your lemons to that role.

The Tank Types

Annihilator


The Annihilator is not in the actual codex, but it is worth a mention. The Annihilator packs a twin-linked lascannon. Yeah. But, it weighs in at a meagre 130 points, meaning if you need 'dedicated anti-tank' but don't have the 35 points + extra tank it takes to get a vanquisher with a commander, the Annihilator is your man. Also works reasonably well against monsters and heavy infantry. If you wanna run them, the best way to do so is to run two of them alongside Pask (in a vanquisher), with lascannon and multi-melta sponsons. You're packing 12 S8/9 shots with an AP of 1 or 2, making that a deadly unit for enemy heavy infantry and most armour. Of course, being relatively cheap armour, they also perform roving alone. 

Demolisher 

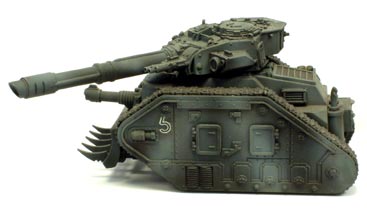
The Demolisher cannon is a S10AP2 Large blast mounted on an AV14/13/11 shell. While at first knick, having AV14/13 should mean that the demolisher doesn't work too poorly, you really feel its short range with only 6" movements. On the plus side, until its cannon or the chassis is gone. Because the Demolisher is only as dangerous as its main cannon, I don't suggest sponsons, however, one could get away with heavy bolter sponsons for making the trip to the enemy line - having a little more S5 packed in there for so few points could do well. The Demolisher works surprisingly well when tripled up in a tank commander - note I don't suggest Pask because he doesn't really do very much for the demolisher here. The reason for this is the flatout move that the tank commander can order. This allows the Demolisher to increase his movement speed by a pessimistic average of 150%, meaning he can make ground in four turns instead of one. Of course, doing this, you're dropping 3 S10AP2 blasts and that's about it, and it cost you a fortune to do so. 

The Demolisher cannon itself is decptive. Being S10AP2 it seems like a pinnacle anti-tank weapon, but this is not true. While it will knock the living bejesus out of almost any armour it comes into contact with, it can only do at most, 1 hull point. Being a large blast, people have this misconception that it will knock seven or 8 targets, but this simply isn't true. If your opponent is  that afraid of the S10AP2 and it gets the chance to shoot, they will spread out to limit casualty potential. Still, The Demolisher remains a fantastic tool when fighting buildings, and an even better tool for knocking out T4/5. Unfortunately for the demolisher, it is fantastic VS. T4/5, making it hard to utilise it Vs. T6. T6 means it can only do at most, one wound and this simply isn't enough.  

Eradicator 

The Eradicator is a S6AP4 Large Blast that ignores cover mounted on an AV14/13/10 shell, it is the cheapest AV14 in the game. The Eradicator is very, very comparable to the similar wyvern. The Wyvern does more damage for its points, against the same targets, but the Eradicator is a harder takedown. This means you can reliably expect 5 or so blasts per game, whereas you can only expect three salvos at the very most. The Eradicator works well with heavy bolters, and one is usually enough. being a large blast, a tank commander is wasteful, so I suggest that they remain as lone operators. The Eradicator has a place in 40k, but it's true that it would be better suited to a different army. 

Exterminator 

The Exterminator packs a quad-gun without skyfire, and is reasonably cheap at 130 points. S7 makes for a versatile main cannon, when comboed with heavy bolters it becomes a reliable anti-light tank and infantry machine. Its decent range gives it an edge over the punisher against all the punisher's targets, and the price difference seals this difference. Exterminatorss work well as bodyguards for better tanks like Vanquishers, but can also perform alone. Having a squad of more than two exterminators is probably wasteful. 

S7 is deceptive. The internet has a raging hardon for this mediocre statline, but S7 Struggles to perform in many roles. People profess its strength against AV12, but this simply isn't the case. While I believe it can be pressed into that role, the S7 profile works best against AV11 and T6 or worse. This makes heavy bolters ideal for it. Also worth noting is that this overzealous faith in S7AP4 permeates many player's minds, meaning most opponents will shoot at exterminators very readily. 

Executioner 

The Executioner packs 3 plasma cannons, and is overpriced at 185 points to maximise its tools. Because of this huge price and the executioner's potency at killing itself, running 3 with Pask is pretty much the only way to run them. Preferred enemy means they should only lose a hull point every five or so turns. You basically have to invest in a squadron of these guys to make them effective. For that reason, I don't feel they're worth wasting half your army on. 

MBT 

The MBT is relatively cheap and packs a S8AP3 large blast. This has better hitting range than the demolisher, but otherwise suffers from the same problems the demolisher does. It's also not nearly as versatile or worthwhile. If you don't like exterminators and don't mind shelling out, two of these make a half (note half) decent bodyguard. Unless the ordnance typing is dropped for heavy, the battle cannon will never be worth the time. 

Punisher

The Punisher Shares some of the Exterminator's weakness. It suffers from people praying at its alter, while usually its short range and relatively weak weaponry limit its effectiveness. You're paying 140 points for a semi-dangerous weapon that knocks very light infantry around for a throw, then gets knocked out.

The punisher is most effective when manned by Pask. This works fantastically well when run alongside a pair of bodyguards that aren't packing twin-linked main cannons. I suggest bringing 3 punishers for Pask. Run the squad up the field until he hits home, then order his squad to split fire. He can deal with almost any armour you throw at him - he should reasonably do 1.72~5.08 hull points to a land raider or rather AV14, averaging 3.4 hull points when shooting. Anything less than AV14, and any Toughness character he should shred a wound or two with ease, averaging 1.7 to 5.2 wounds when fighting anything better than T6. While the punisher is certainly versatile in Pasks' hands, don't overestimate how effective it is. Let your opponent make that mistake for you.

Vanquisher 

The Vanquisher is Armoured Superiority in a name. Its main cannon can go toe to toe with an orbital bombardment for final damage, and can make him an extremely dangerous opponent for any enemy armour. About the only thing it lacks in terms of anti-vehicle is skyfire/interceptor. Of course, the vanquisher is not without its faults. It needs to be well supported, and works best on a tank commander which necessitates it being fielded alongside a squadron. Fielding many more than one of them begins to become inefficient as it's usually enough to get the job done at close range with a pair of multi-meltas. 3 Vanquishers works without a commander, but it definitely needs to have prescience behind it. With prescience, the pack of vanquishers can potentially flatten even superheavies with relative ease. Also worth noting is if taken with a commander, the vanquisher is shot by a character, and thus has precision shots on 6's. Remember this, as instant-deathing specific targets can be massive. 

Personal favourite:

My Personal favourite from a gameplay, aesthetic and fluff perspective will always be the vanquisher. IT packs a tonne of heat and really embodies what a tank-hunter should be. I know it's not the best tanke, but I can't help myself when it comes to saying nice things about it.